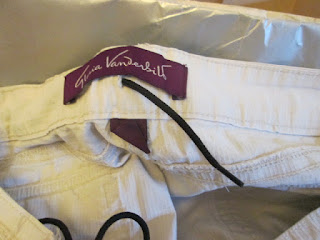
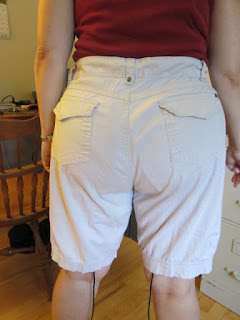
The problem with these shorts was similar to the problem I'd had with the first pair I found at Sears: they fit in the hips and thighs, more or less (though they're still a bit lower and snugger than I really like), but the waistband left a huge gap behind my butt. What can I say...baby got back.
Since the gap in the waistband was right at the back, I decided to design my drawstring to tighten at the center rear of the waistband. And since it couldn't go all the way around the waist without interfering with the zipper and buttons, I decided to make it a pair of strings that could be tied together. So I got a pair of old shoelaces...
...made a discreet hole in the inside of the waistband, right behind the belt loop...
...inserted one end of the shoelace into the hole...
...and, grasping hold of the aglet, worked it through the length of the fabric to the middle by repeatedly scrunching and releasing the fabric.
Eventually, I made it to the middle, where I slipped it through a second discreet hole I'd cut in the waistband right under the tag.
I tied knots in both ends of the string to keep then from slipping back into the holes and out of reach.
Then I repeated the process on the other side.
The pair of drawcords could then be pulled snug and tied together on the inside. This eliminated the gap at the waist, but it didn't exactly look good. Not only was the waistband a bit lumpy, but the shoelaces were so long they trailed right down to the floor.
Clearly, these laces were the wrong tool for the job. What I needed was some sort of elastic to gather the waist so that it would fit snugly. Fortunately, I found some at the local dollar store, in assorted colors.
So I went back and repeated the whole process using the white elastic from the package. I also decided to remove the label from the back of the shorts, since it was just getting in the way. When I was done, I had two elastics feeding in from the side belt loop to the middle, where I tied them together in a small bow.
And this time, when I put them on, they fit—not perfectly, maybe, but at least passably. So for $5.36 total—$4.29 for the shorts and $1.07 for the elastic—I now have one new pair of shorts to add to my rotation. So that, plus the new pair I found at Sears, ought to keep me decently dressed until the heat wave breaks. (Labor Day may be the first day of fall as far as Miss Manners is concerned, but Accuweather begs to differ.)
So there you have it: a quick DIY hack for fixing pants and shorts that gap in the waist. Between this trick and the Colorful Canary method, I hope to be able in future, if not to actually find pants that fit me, at least to make pants that fit me.


No comments:
Post a Comment